Finding the slab cache for each object in Linux kernel using static analysis

Introduction
I’ve seen a lot of papers in the academia talk about static analysis in linux kernel’s source code. Some use old tools like KINT, some others just mention an LLVM use-def pass, but for a newcomer it’s difficult to write all of those on their own. In this blog post, I will go step by step into how to track a variable allocation, its data type and it respective kmalloc cache. I will be running everything in Ubuntu 20.04 but it can work in any OS if you try hard enough. For this analysis we will try to infer the kernel cache for each kernel object.
In this mini-project I will be using clang-13 with linux kernel 5.13.14 (same kernel as in my other blog post where I exploit CVE-2017-27666).
Setup
We start off with downloading and extracting the linux kernel code as follows:
wget https://cdn.kernel.org/pub/linux/kernel/v5.x/linux-5.13.14.tar.gz
tar -xf linux-5.13.14.tar.gz
rm linux-5.13.14.tar.gz
Then we need to download clang-13 specifically release tag llvmorg-13.0.1 from github (check the code below).
After downloading we patch it in such a way that when we compile the kernel we dump the LLVM bitcode before the optimizations happen (the linux kernel must be compiled with -O2 flag so we can’t turn it off).
This patch allows the compiler to write the bitcode file with extension .c.bc for each .c file that is compiled.
Download the patch from here.
In short, you can make this clang using the following commands:
# setup llvm-13
git clone https://github.com/llvm/llvm-project.git
cd llvm-project
git checkout llvmorg-13.0.1
git clone https://gist.github.com/f81771e4a8ea6cce8ec79279eb07d18c.git llvmpatch
mv llvmpatch/llvm_write_bitcode_13.patch ./
git apply llvm_write_bitcode_13.patch

# now compile clang in RELEASE mode
cmake -S llvm -B build -G Unix Makefiles -DCMAKE_BUILD_TYPE=Release
cd build
make -j$(nproc)
Note that these commands work for Linux. To build this on Windows just read their README from the github repo. If you are using TempleOS, unfortunately Terry Davis didn’t consider llvm-project holy enough to be supported(I made that up).
Compiling the kernel
Now that you have clang compiled let’s go back to the Linux kernel directory and compile it (after make defconfig) using this command line: make CC=<path to: llvm-project/build/bin/clang> -j$(nproc)
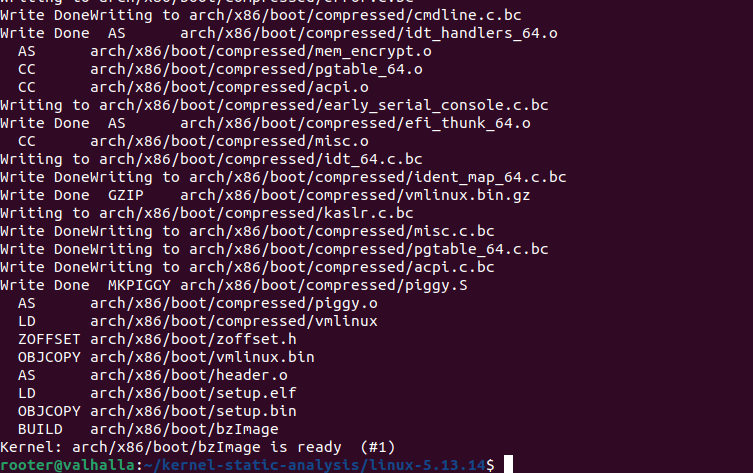
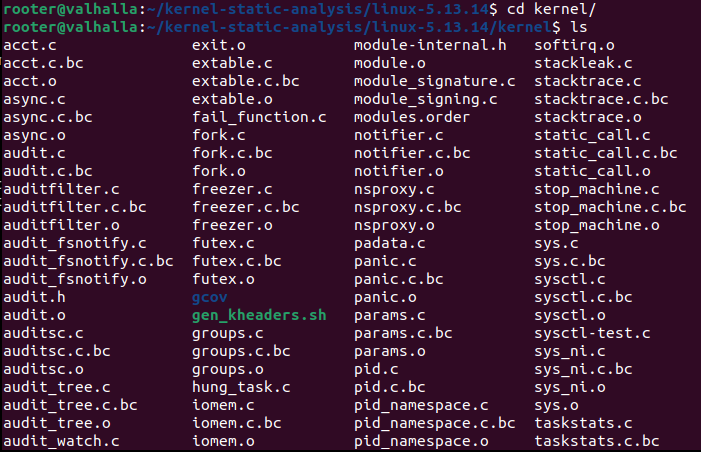
After compiling you should be getting an output that looks like Figure 1. Now in the compiled kernel directory we have a bunch of files that look like Figure 2. As you can see below we have a bunch of .c.bc files.
Analyzing the kernel
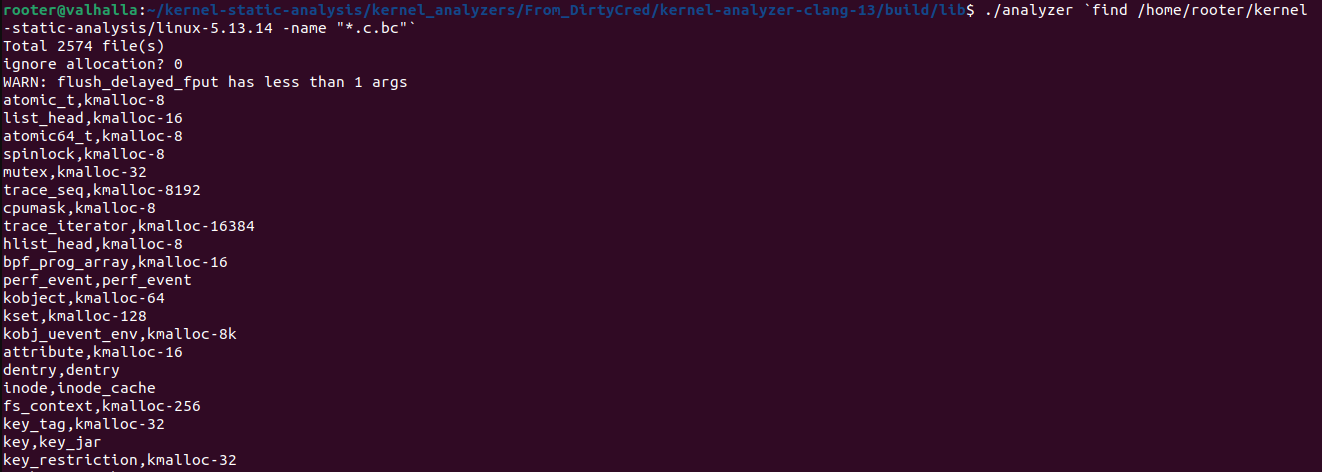
As a quick start lets download a modified version of KINT and compile it. This version is a modified one from the DirtyCred’s code. First let’s clone the github repo and compile it. The analysis binary is in ./build/lib/analyzer. We feed every single .c.bc file generated by the compiler as an argument for the analyzer and run it. To do that we go to ./build/lib/ and run this command in a bash shell that supports this weird apostrophe: ./analyzer `find <ROOT OF KERNEL SOURCE> -name "*.c.bc" ` 2> struct_cache_res.txt.
The command first executes the find in the root of the linux kernel and prints out a list of all files that end with .c.bc. This list is the fed as parameters to the analyzer program. The 2> makes both stdout and stderr be written into struct_cache_res.txt file. This way all the output of the analyzer is stored in a file to be processed later as needed. When we run this command (after removing the file dump part) on the kernel we compiled above we get the results in Figure 3.
Explanation
Now that we know we can do this, let’s dive deeper into how it works exactly. Since this code has been repurposed by many other people, it has many variables that are not useful to us. The meat of the analyzer is in src/lib folder, so go in that directory and open VScode using code . command. The program starts from KAMain.cc. In line 162 the program loops through all the arguments (the .c.bc file paths), reads the LLVM IR (Intermediate Representation) and parses it into a LLVM::Module object. In the end it runs doBasicInitialization function that parses all the structures defined in that Module and populates it with info such as the fields/members and the struct size. This will be useful later to determine the cache based on the struct size. The thing that I modified is printAllStructsAndAllocCaches(); from StructAnalyzer.cc. The new function now calls getAllocCache() (in StructAnalyzer.h) for each structure. In Figure 4 you can see part of that code.
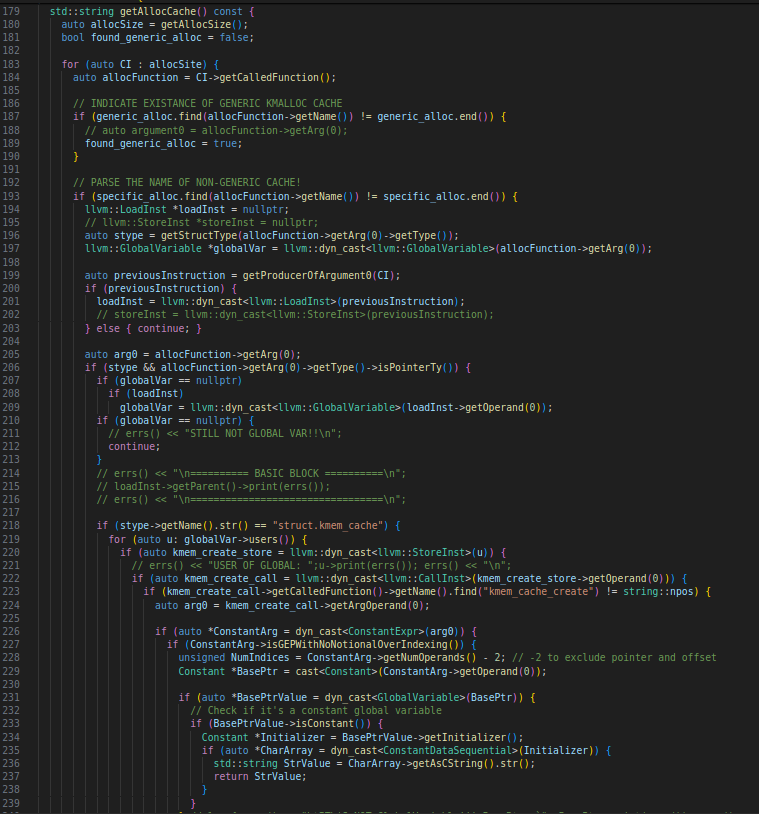
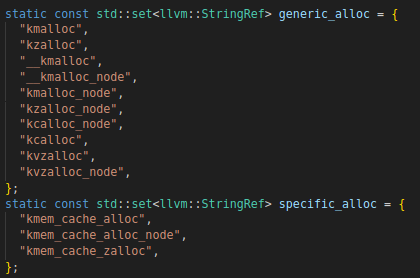
At first(line 187), the code loops through all the allocation sites and checks if the function that allocates the structure is kmalloc or other generic allocation functions (as shown in Figure 5). If any of them is not, then it will go into the first argument of the special function and grab the cache. For example kmem_cache_alloc takes as the first arguments the pointer to the cache. This pointer is usually a global variable, which is first NULL. At runtime this global variable will point to a kmem_cache structure, which is created/allocated after calling kmem_cache_create.
My code goes to this global variable and checks if its data type is kmem_cache structure (line 218). If it is, then we loop through all of its users (the LLVM instructions that read or write this global variable) as shown in line 219 in Figure 5. After kmem_cache_create is called the return value needs to be STOREd into the global variable; not assigned, even though it looks like global_var = kmem_cache_create(...);. So the code finds the StoreInst from the users (line 220). In line 222 it goes backwards towards the source (the create function call) and in checks if the function call is kmem_cache_create (line 223). If true the code then extracts the first argument of this function calls which is a hardcoded string containing the name of the cache as shown here.
Future work
Of course, there is more room for improvement. When dealing with generic allocation calls (ie. kmalloc) we simply consider the objects to fall into the closest cache that fits it, however this may not always be the case. We can improve this by going backwards from the call graph of these functions to find the kmem_cache from kmalloc_slab function.